

The ESP32 Camera Module is very demanded product in our Shop section.

The ESP32-CAM-MB module is a small camera module with a size of 39.8mm x 27mm. This module can work independently, just connecting the USB cable.
Here is a quick guide to get started and playing with this development board.
1. Connect the Camera to the USB port on your computer

You’ll see the power LED in red.
2. Open the Arduino IDE and select File –> Preferences

3. Add the ESP source code link to the Additional Boards Manager URL’s

Add the following link to the ‘Additional Boards Manaher URLs: https://dl.espressif.com/dl/package_esp32_index.json
4. Install the ESP32 libraries in the Board Manager

In Tools –> Board Manager, search for esp32 and click “Install”. Make sure the package is shown as “Installed”.
5. Open the AI-Thinker ESP32-CAM board

In Tools–> Boards Manager, select the ESP32 –> AI Thinker ESP32-CAM
6. Open the Camera Web Server Example Project
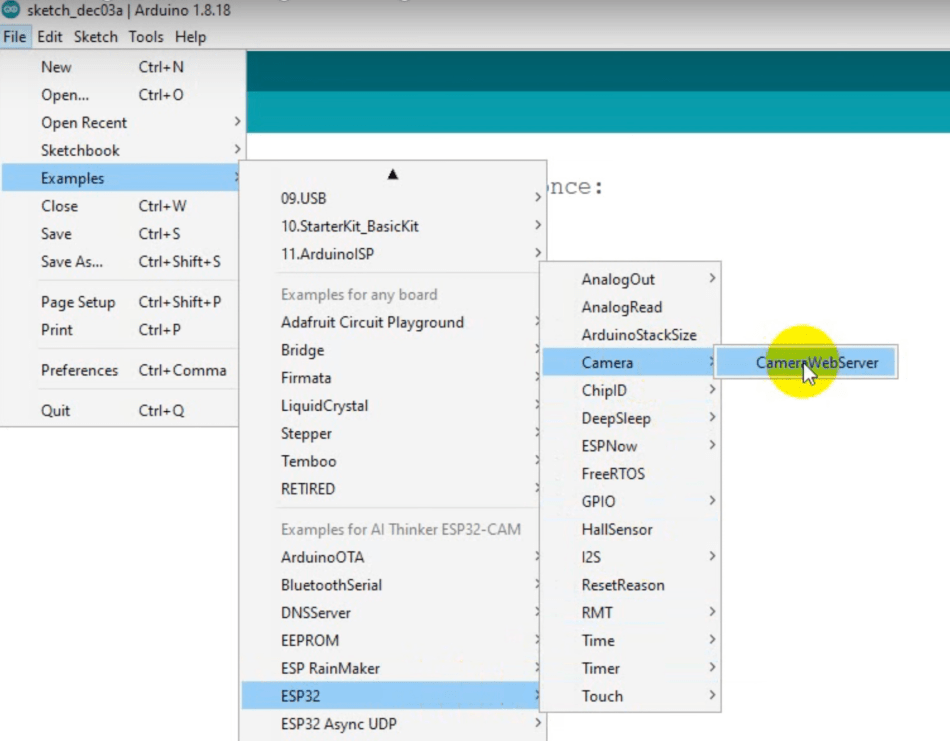
Open Files–> Examples–> ESP32 –> Camera –> CameraWebServer project
7. Define the Camera Model AI Thinker

Make sure to uncomment the “define CAMERA_MODEL_AI_THINKER” line. It should be the online one enabled for this example.
8. Set the SSID and Password for your Wifi network

Replace the “*” with the SSID name and password of your local Wifi Network. Make sure is the same network your computer is also connected to.
9. Verify COM Settings

Make sure all the settings are similar to the screenshot. COM port should be the one your module is currently connecting to your computer.
9. Verify serial speed is set to 115200 Baud

10. Run your code

On the top right, press the arrow to run your code. You will see the ‘uploading’ progress on the terminal bar.
11. Reset the module

When you see the message, reset the module via the reset button.
12. Click the Serial Monitor output and verify the server address

The camera module will reboot, connect to your wifi, and add the address of the web server. Check the “Camera Ready!” line. You will use that address in your web browser.
13. Open your web browser and paste the IP of the web server

At the bottom you will see the “Start Streaming” button. Press it to start the camera.
Play around the camera controls…
Have fun!
Discover more from Pacific Custom Engineering
Subscribe to get the latest posts sent to your email.
You must be logged in to post a comment.